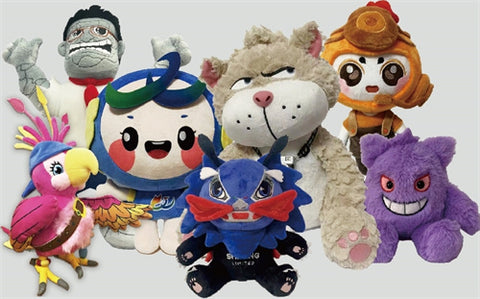
How to Make Custom Plushies
Custom plushies are now popular as unique gifts, collectibles and promotional products. Creating your own custom plush toys lets you create characters, animals or even original designs in an incredibly soft and cuddly shape. If you’re a fan of crafts and want to create a unique souvenir or a small-scale business owner who wants to launch an exclusive line of custom plush toys, knowing the process of making custom plushies is crucial. This article focuses on how to create custom plushies, providing you a detailed step-by-step guide from concept to finished plush toys.
A Step-by-step Guide to Make Custom Plushies
Step 1: Concept and Design
The first step to making a custom plushie is defining your concept. It could be a unique persona, a pet resemblance or a fan design.
This chart provides the essential elements and steps to consider during the design and concept phase that form the basis for the successful creation of a custom plushie.
| Stage | Description | Considerations | Outcome |
| Idea Generation | Then, you can brainstorm the character, animal or other object to design | Themes, target audience Uniqueness | Inspiration or clear concept |
| Sketching | Designing initial sketches with front as well as side and back perspectives | Proportions face features, face features, colors and more | The visual image of this plush |
| Character Traits | Define personality and characteristics (e.g. posture, expression) | The desire for emotions, appeal, and playability | Personality traits of a character are defined |
| Size and Scale | Choosing the size of the plushie | Intentional use (toy and collectible) Transferability, intended use | Physical size plans for the future |
| Material Selection Plan | Initial ideas for textiles and textures | Softness, durability, colorfastness | Ideas for texture and fabric palettes |
| Special Features | Planning accessories, movable parts, or unique elements | Security, functionality, and complexity | A list of distinct design elements |

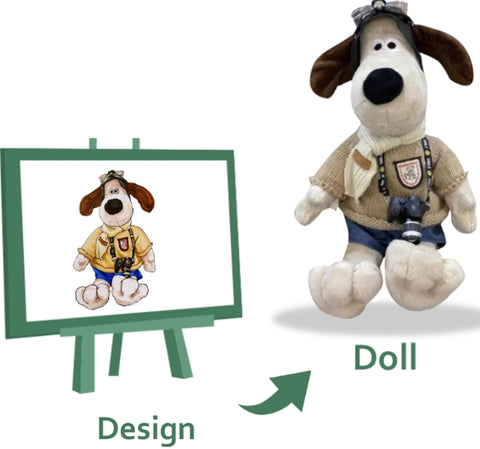
Step 2: Creating a Prototype
When your design is finished on paper, the following step will be to design the prototype. This can be done by hand sewing an initial prototype or by using a digital modeling program.
To create prototypes by hand, basic sewing techniques and materials like felt or fleece are a great way to evaluate dimensions and forms. Prototyping can help identify problems with construction and helps refine the specifics before moving to production.
Step 3: Pattern Making
A precise sewing pattern is vital for bringing your plushie to life. The pattern breaks the design down into flat shapes that can be cut from fabric and sewn together.
This chart details the procedure for creating an accurate and practical sewing pattern, which is crucial for creating custom plush toys.
| Step | Description | Key Considerations | Outcome |
| Draft Initial Shapes | Cut the plushie’s design into flat forms for each body part. | Accuracy, matching design proportions | Basic pattern pieces drafted |
| Create Pattern Templates | Print shapes on paper or in digital format | Accuracy in measurements with seam allowances in place | Templates for cutting that can be used to cut |
| Test Fit using Prototype | Utilize fabric or paper to make the mock-up | Make sure you are aligned, the size, and shape | Make the necessary adjustments |
| Refine and Adjust | Modify patterns pieces Based on feedback from the prototype | Correct distortions, improve fit | The pattern is perfect and has been finalized. |
| Add Seam Allowances | Make sure to leave extra room to sew seams | Consistency in seam size | Sewing-ready pattern pieces |
| Label Pieces | Label each piece with identifiers and directions | The assembly process should be clear and transparent. | A well-organized and clear pattern is set |
| Digitize Pattern (Optional) | Convert paper patterns into digital files to ensure a exact replication | Software compatibility, scalability, and scalability | Digital pattern to be used in production |
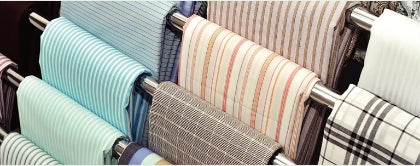
Step 4: Selecting Materials
Selecting the appropriate materials can affect the appearance, feel and longevity of your toy. The common plush fabrics are:
- Minky and Plush Fabric: Fuzzy and soft, perfect for the body’s main part.
- Fleece: Soft and stretchy, making it easy to use.
- Felt: It is commonly used for small details such as eyes or other accessories.
- Cotton or Canvas: For more robust pieces or clothes.
Also, you’ll need stuffing materials, such as polyester fiberfill to provide softness and structure. Other elements include safety eyes, thread or embroidery threads to create facial features, and perhaps wire for poseable legs.
Step 5: Cutting and Sewing
With your pattern and fabric in hand, cut the fabric pieces with care. Sewing can be accomplished either by hand or using a machine according to the quantity and complexity.
Typically, sewing begins by the assembly of smaller pieces like legs or ears, before sewing them onto the body. Be aware of seam allowances and make sure the pieces are aligned correctly to ensure smooth and even finishing.
After sewing the majority of the custom plush toys inwards, you should leave an opening to fill it with stuffing.
Step 6: Stuffing and Assembly
Then stuff the plush toys with polyester fiberfill and adjust the quantity to get the desired shape and firmness. Utilize tools such as chopsticks and stuffing sticks to get into small corners.
After stuffed, stitch the seam shut with the ladder stitch to create an unnoticeable seam.
Add any other elements such as embroidered features such as safety eyes, embroidered features or other accessories. Be sure all attachments are secure particularly if the toy is designed for children.
Step 7: Quality Check and Final Touches
This chart outlines the essential steps needed to ensure that a custom plush toy meets the quality standards and is ready for gifting, sale or for personal use.
| Step | Description | Key Considerations | Outcome |
| Visual Inspection | Look over the plushie to find obvious flaws like uneven seams, loosened threads, or any flaws in the fabric. | Make sure you are satisfied with the aesthetics and quality of craftsmanship | Find areas that require improvement |
| Stuffing Consistency | Make sure that the all stuffing is evenly distributed and the right firmness has been achieved. | Avoid clumps or soft/hard sections. | Forms uniform and comfortable |
| Attachment Security | Make sure that noses, eyes as well as accessories and joints are securely attached | Security, particularly when it comes to toys for children | Durable, safe plushie components |
| Symmetry and Proportion | Verify that the plushie is in line with design proportions and has the same size as intended. | The same look from every angle | Well-shaped, balanced plushie |
| Seam Strength Test | Pull seams gently to ensure they’re durable when washing and handling. | Langevity and resistance against wear and tear | Long-lasting, reliable seams |
| Final Detailing | Include any tags, embroidery ribbons, packaging | Personalization, branding and presentation | Completed, market-ready plushie |
| Cleanliness Check | Eliminate stray threads and filt, or other manufacturing debris | Hygiene and appearance standards | Polished, clean final product |
Useful Tips for Making Custom Plushies
- Include Adequate Seam Allowances: When you design the sewing pattern, make sure to include a sufficient seam allowance. This additional margin will ensure that the pieces stay in place and stops your plushie from shrinking or bending when sewing.
- Stuff Evenly and Gradually: Stuffing plays an important role in your plushie’s appearance and feel. Make sure to add it slowly and evenly to avoid lumps and excessively hard areas. Tools such as stuffing sticks or chopsticks can assist in pushing filling into tight or small areas.
- Secure Attachments Properly: Security is paramount, particularly when it comes to toys designed for children. Attach safety eyes, noses and other accessories with a strong grip or choose embroidery to prevent the risk of choking. The features that are secure will also last during play and washing.
- Use Invisible Stitches for Closing: The finishing of openings using invisible stitches, like this ladder stitch will give your luxurious the appearance of a professional polished finish. These stitches are durable as they blend in seamlessly with the material.
- Maintain Proper Proportions and Symmetry: Make sure to compare the parts of your plushie while assembling to ensure proportions remain exact and ensure the symmetry. This care to detail will ensure that your plushie appears well-balanced and pleasing from every angle.
- Pay Attention to Small Details: Small details, such as embroidery smileys or appliqué patches or ornaments, give it personality and individuality. The time spent to perfect these features elevates your toy from basic to unique.
- Prioritize Safety and Use Non-Toxic Materials: Use non-toxic materials threads, threads and other materials. Make sure to avoid small parts that can be detached when creating toys for toddlers to avoid choking hazards.
- Practice Patience and Experimentation: The art of making plushies requires time and effort. Be patient, experiment with various techniques and materials and gain knowledge from each attempt to increase your skill.
- Document Your Process: Take notes and photos of your process. This will help you keep track of the things that work, pinpoint areas to improve and replicate successful designs in the future.
- Consider Eco-Friendly Options: Sustainability is becoming more vital. Consider eco-friendly fabric and stuffing options to create toys that are not just adorable but also sustainable.
Optional: Mass Production of Custom Plushies
If you plan to make multiple plushies, you may want to collaborate with a company that specializes in creating custom plush toys. They can help with pattern design and fabric sourcing and large-scale sewing. The provision of detailed models and technical documents ensures that there is a consistent look across all machines.
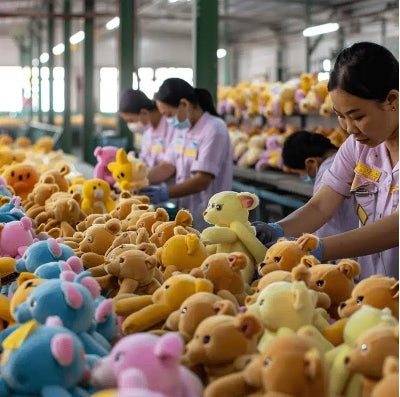
Implementer is a professional custom plush manufacturer that specializes in the creation of high-quality, unique plush toys that are tailored to your specific requirements. With skilled craftsmanship, modern manufacturing capabilities and a commitment to use safe, durable material, Implementer delivers custom plush toys that help you bring your creative ideas to life, whether for gifts, promotions, or brand merchandising.

Final Thoughts
Making custom plushies is an exciting blend of creativity, craftsmanship and technical skill. When you’re making a unique piece or launching an entire line of plush toys, following these steps from design to final assembly will help you create adorable, high-quality plush toys that will bring your ideas to life.