How to Design Your Own Plushie
The process of creating a custom plushie is an excellent way to show your imagination. Designing your own plush toys will transform your imagination into something that you can put with your fingers. If you’re creating a unique gift, launching your own business of making plush toys or simply making a favorite character come to life, this process blends art along with craftwork as well as a touch of engineering. This article will guide you through the steps in designing your own plushie, helping you bring your vision to life.

Why Designing Your Own Plushie Becomes More and More Popular
1. The Rise of Personalization and Unique Expression
Today’s consumers increasingly appreciate individuality and their own expression. The ability to design your own plush toy lets the creator to create a product that expresses their personal desires, tastes and personalities. Contrary to mass-produced toys plushies have a unique appeal that attracts those who want special and unique products. This demand for personalized items is the reason for the increasing popularity of the plushie.
2. The Influence of DIY Culture and Online Communities
The growing DIY (Do Do It Yourself) trend has prompted people to pursue hobbies of crafting like plushie making. Forums, online tutorials along with social networking platforms, have made this process more accessible and enjoyable for novices as well as experienced crafters. These communities on the internet offer guidance, inspiration and useful strategies, and encourage more people to create their own plushies for an enjoyable hobby.
3. Emotional Connection and Nostalgia
For a long time, plushies were associated with nostalgia and comfort. When people create their own personal plush toys they typically create toys that hold personal memories or reflect cherished characteristics. The emotional connection is what adds significance to personalized plushies making them precious keepsakes or thoughtful gifts. The ability to incorporate personal significance into a plushie can make the design process more appealing.
4. Opportunities for Small Business and Entrepreneurship
The growing market for handmade and artisanal products has provided new opportunities to plushie creators. Many designers have transformed their passions into small-scale businesses that offer customized plushies on platforms such as Etsy or Instagram. The entrepreneurial spirit is attracting people to study the art of designing plushies, mixing the creative with business goals and further accelerating the trend.
5. Advances in Technology and Materials
Modern technology and access to top-quality materials has made the process of creating custom plush toys simpler to create and even more expert. Digital patterns-making tools, inexpensive sewing machines, as well as numerous materials and accessories allow artists and hobbyists create stunning products. These advances reduce the barriers to entry and allow many more people to take part in plushie-inspired design and help to increase its popularity.
A Step-by-Step Guide to Designing Your Own Plushie
Step 1: Finding Inspiration and Developing Your Concept
Every great toy begins with a spark of creativity. It doesn’t matter if it’s a cute animal or an amazing creature or a favorite character from your imagination The initial step should be to determine the concept you’d like to develop. Think about the character the pose, style, and pose of your favorite. Are they cute and round or tall and slim or fun and quirky? A good grasp of these features early on can guide your design and assist you in creating an adorable plushie that reflects your style.
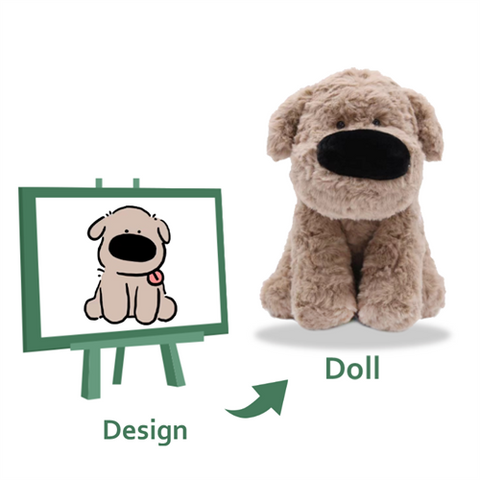
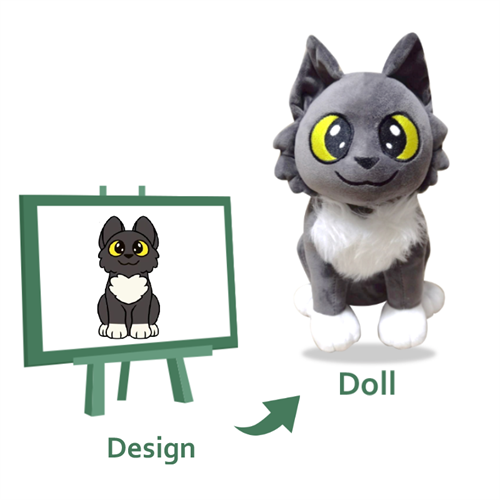
Step 2: Sketching Your Plushie Design
When you’ve got an idea that is clear, writing it down on paper can help make your thoughts more concrete. Sketch your doll from three different angles – front, side and back, to see the shape and proportions. Do not worry about it if you’re not an experienced artist. The sketching rough sketches can be enough to sketch out the locations of the eyes, limbs, ear and other parts will be. This step is vital since it determines the way you cut and stitch your pieces of fabric later.
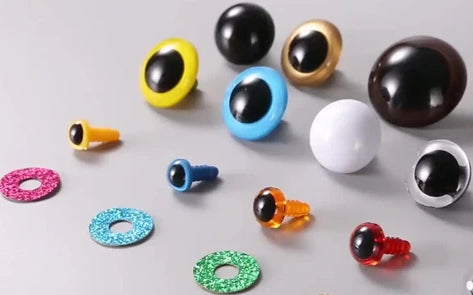
Step 3: Choosing the Right Materials
The selection of fabric and material directly affects the feel and appearance of your customized plush toys.
Here’s a chart that summarizes the the common materials you can use to create your own plushie.
| Material | Description | Common Uses | Advantages |
| Minky Fabric | Soft plush, silky, and smooth synthetic fabric | Fabrics for the body and exterior | Very soft, cuddly and simple to sew |
| Fleece | Warm elastic synthetic fabric | A plush body, limbs and accessories | Soft durable, durable and readily accessible |
| Felt | Dense, non-woven fabric fashioned of synthetic or wool fibers | Ears, facial features, and even small specifics | Easy to cut and gluing Forms well, stays in place |
| Cotton Fabric | Natural fiber fabric that is versatile | Clothing, outer body or accessories | Easy to breathe as well as easy to use |
| Polyester Fiberfill | Soft, fluffy stuffing material | Filling in the plushie | Lightweight, washable and hypoallergenic |
| Safety Eyes | The plastic eyes have locking backings and lock backs. | Eyes and facial highlights | Realistic, secure and safe for children |
| Embroidery Thread | Thread used to stitch specifics | Patterns, facial features | Durable, customizable, and vibrant |
| Velvet | Smooth, soft fabric the appearance of a shorter pile | Luxurious plush exterior | Elegant look, rich texture |
| Chenille Yarn | Soft, fuzzy yarn | Fur, hair, or decorative elements | Gives dimension and texture |
Step 4: Creating Your Pattern
Making an idea into a functional stitching pattern is following crucial step. This requires breaking down the design into basic shapes which can be traced on fabric. It is possible to create templates on paper for each body part–heads legs, arms, and torso. Then, add seam allowances so that your pieces are able to be joined correctly. Test your design by creating an initial prototype using a simple fabric will help you to adjust proportions before assembling the final fabric.
Step 5: Sewing and Assembling Your Plushie
Once you have your pattern completed and the fabrics cut out, it’s now time to join the pieces. Making plushies is usually done by stitching pieces upside down and flipping them upside down to create a neat, tidy finish. Be patient with the smaller things, like adding ears or facial features as they are a great way to add character and appeal. Then, fill the plush toy in a uniform way to ensure the desired firmness, and then carefully seal the opening using hand stitches.
Here’s a chart that describes the most popular sewing techniques employed in the custom plush manufacturing process:
| Sewing Technique | Description | Typical Use in Plush Making | Advantages |
| Running Stitch | Straight, simple stitch is created by passing needles in and out | Basic seams and temporary holds | Easy and quick, excellent for slicing and basting |
| Backstitch | Strong stitch in which needle doubles over the previous stitch | Main seams requiring durability | Secure and strong |
| Whipstitch | Loop stitching across the edge of the fabric | Closing the openings, securing small pieces | Nice finish, great to sew by hand |
| Slip Stitch (Ladder Stitch) | Invisible stitch used to secure seams | Closing stuffing openings | Gives a smooth finish |
| Overcast Stitch | The stitch wraps edge of the fabric | In order to prevent fabric fraying | Helps reinforce edges |
| Zigzag Stitch | Machine stitch in a zigzag pattern | The stretchy seams and edges are finished | It increases flexibility and stops fraying. |
| Topstitching | Stitch stitched on the exterior of a seam for reinforcement or decoration | The addition of details or enforcing seams | Functional and decorative |
| Applique Stitch | Stitch used to secure fabric patches | Add decorative elements such as eyes or patches | Secures appliques firmly |

Step 6: Adding Unique Finishing Touches
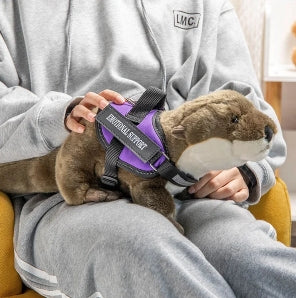
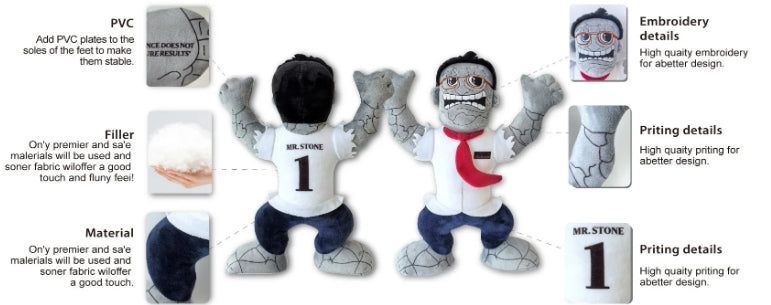
The finishing touches give your plushie its uniqueness and character. Create embroidered eyes and a mouths for a secure and personalised look. You can also make use of safety eyes for a realistic, glossy look. You can dress your toy by putting on tiny clothes, adding accessories and personalize the item by putting a name tag on it or a scent sachet. These small details help it stand out and strengthen the bond to your pet.
Troubleshooting Common Issues in Designing Your Own Plushie
Here’s a table that summarizes the most frequent problems you’ll encounter when creating your own custom plushie, and the effective way to solve these issues:
| Common Issue | Cause | Solution / Troubleshooting Tips |
| Uneven or Bulky Seams | Fabric that is too large or uneven sewing | Cut seam allowances and sew in a steady and even manner; make sure you use the proper seam allowance |
| Plushie Losing Shape | Overstuffing or uneven stuffing | Make sure to fill it evenly and in a moderate manner and evenly; use high-quality polyester fiberfill |
| Fabric Fraying at Edges | Fabric that is not finished or edges exposed | Use zigzag or overcast stitches Consider using the fabric glue or fray check |
| Difficulty Turning Small Parts Inside Out | Patterns that are complex or thick fabric | Utilize a thinner fabric or smaller seam allowances; and use turning tools, such as chopsticks |
| Misaligned Features (Eyes, Ears, etc.) | Pattern markings that are inaccurate or shift fabric | Make sure you clearly mark the points of placement Pin features prior to sewing |
| Loose or Falling Off Details | Sewn insecurely or using poor techniques for attachment | Make sure you use strong stitches or embroidery; fix safety eyes correctly |
| Fabric Puckering or Wrinkling | Sewing tension too tight, or fabric pulled while sewing | Adjust tension on sewing machine and sew with a consistent speed and pressure |
| Opening Not Closing Neatly | Hand stitching that is not perfect or with uneven edges | Use a ladder stitch for invisible closure; trim edges in a uniform manner |
Final Thoughts
Designing your own plushie can be an amazing blend of imagination, craftsmanship and fun. With a bit of patience and a lot of passion you can create an adorable plush toy that is special and important. Why not begin sketching now? Your perfect plush toy is just around the corner!