
How to Make Custom Keychains: 6 Steps From Design to Production
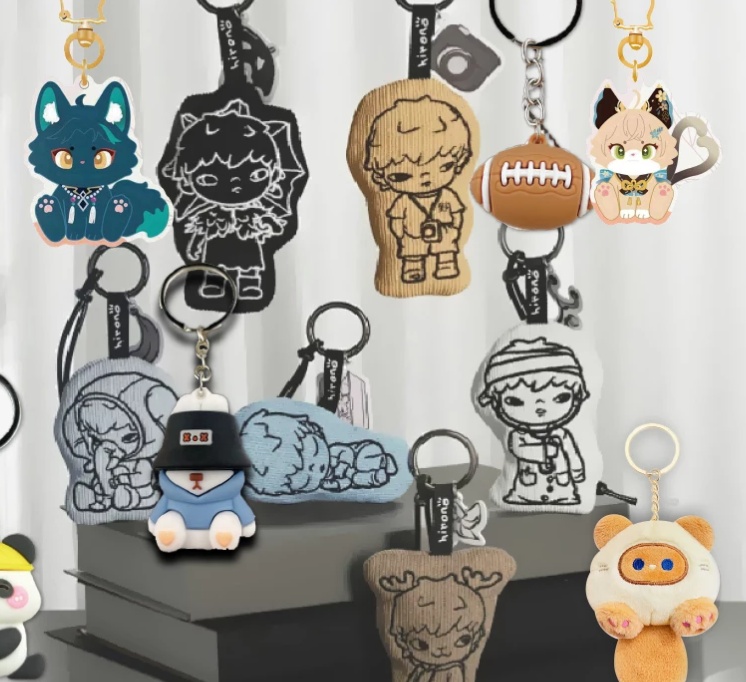
So. You want to know how to make custom keychains. Good news. It’s not nearly as complicated as people make it sound. Maybe you’re putting together a gift. Something handmade. Something that actually means something. Or maybe you just want a keychain that looks like you, not like something off a rack at the gas station.
Or maybe you run a business. Branded merch. Promo stuff. That works too. Whatever your reason, the whole thing boils down to three big choices. Design. Material. Production method.
Get those right, and you save yourself a lot of headaches. No wasted materials. No print samples that look nothing like what you expected. Just a clean, step-by-step process that takes your screen design and turns it into a physical object. One that actually holds up when people use it every day.
1. How to Make Custom Keychains Step by Step
Here’s what a good custom keychain needs. Two things, really. First, it has to look great. Second, it has to survive real life. Bags. Keys. Drops on concrete. The works. So you’re balancing two worlds here. Design beauty on one side. Manufacturing reality on the other.
These six steps cover the whole journey. From a file on your computer. To something you can hold in your hand.
Step 1: Create or Prepare Your Design
Let’s be real about something. Your finished keychain will never be better than the artwork you start with. Never. So high-resolution files? Non-negotiable.
Use professional tools. Adobe Illustrator is a solid choice. Vector formats work best – AI, EPS, or SVG. If you’re stuck with PNG or JPEG, check the resolution carefully. Needs to be at least 300 DPI at final print size. Anything less, and your text gets fuzzy. Those clean lines turn into a blurry mess. And convert colors to CMYK. That helps reduce differences between screen colors and printed results.
One more thing. Think about physical size from the very beginning. Tiny details? Lines thinner than 0.5mm? They might just disappear after manufacturing. Keep that in mind.
Step 2: Choose the Right Material
This one matters. A lot. Your material affects durability. How it feels in someone’s hand. And of course, how much it costs to make.
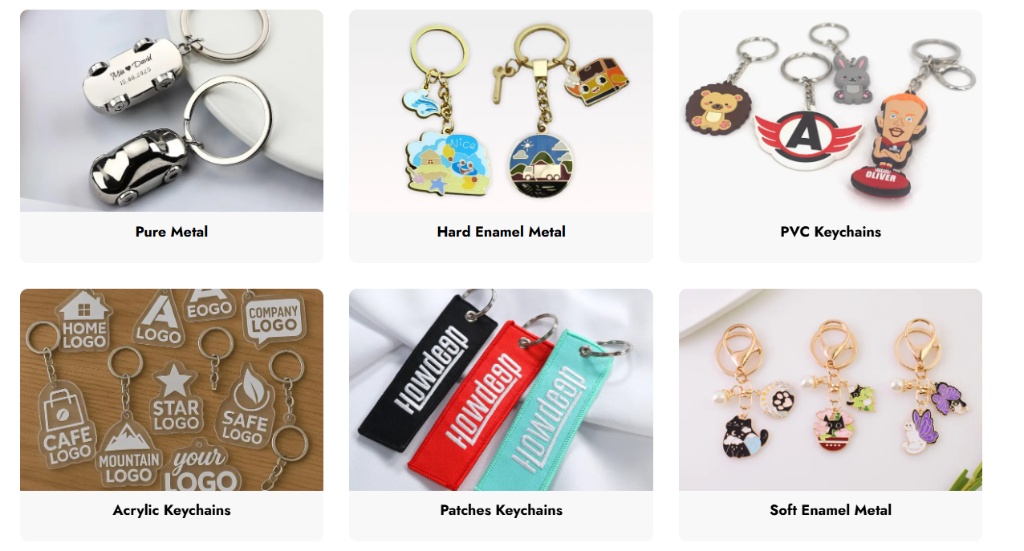
Check out the popular types of keychains. Get a feel for what’s out there. Acrylic? Bright colors pop. Complex cutouts work great. Soft PVC? Flexible. Shockproof. Perfect for those 3D cartoon characters. Metal? Tough as nails. Feels premium. Corporate gifts love this stuff. Resin? You can bury dried flowers or glitter right inside it.
Match your design to the right material. Your keychain will last way longer. Simple as that.
Step 3: Choose the Production Method and Create the Shape
Alright. Now you need to actually make the shape. The right method depends on how complex your design is.
Flat materials like acrylic? Laser cutting. The laser follows your outline precisely. Clean edges. No fuss. PVC or metal? Injection molding. Liquid material goes into a steel mold. Hardens into shape. Resin keychains are usually created through casting, where liquid resin is poured into silicone molds and cured into the final shape.
Quick tip here. Stick with rounded corners whenever possible. Sharp inner angles? They create weak spots. Drop it once, and it might snap. Nobody wants that.
Step 4: Add Your Artwork and Finishing Details
Now you get your design onto that base shape. Different materials need different equipment.
Acrylic uses an industrial UV printer. Lays down the ink. Cures it instantly. Metal? Usually enamel paint. Baked into recessed areas. Soft PVC keychains are produced by injecting colored PVC material into molds and curing it layer by layer.
Want some extra protection? Add a clear epoxy dome over the print. Thin coating. Stops scratches from keys and everyday rubbing.
Step 5: Assemble Hardware
That little ring? It’s what keeps your keychain attached to anything. So don’t rush this step.
For DIY projects, you can drill a small hole by hand. In factory production, the hole is built right into the cutting or molding stage. Nice and clean.
Now grab some flat-nose pliers. Twist the jump ring open. Slide it through the hole. Hook on the key ring. Then twist the jump ring back until the ends meet perfectly. Make sure it’s tight.
Step 6: Quality Check & Finishing
Before you bag anything up, stop. Look at each piece under good light.
Check for scratches. Dust. Bubbles trapped in the resin. Paint that bled outside the lines. Then give that metal ring a firm tug. Confirm it’s closed. Confirm it won’t pop open.
Wipe off fingerprints. Then slip each keychain into a protective plastic bag. This stops them from scratching each other during shipping. Small thing. Makes a big difference.
2. What Materials Are Used for Custom Keychains?
Picking a material isn’t just about looks. Obviously.
You also need to think about physical properties. How the artwork shows up. Who’s actually going to use the thing.
Acrylic: Transparent acrylic shines when you want vibrant, high-detail artwork. It’s made from tough, impact-resistant plastic sheets. Print on both sides. Lasers cut complex outlines easily. Independent illustrators love it. Anime creators use it. Retail brands rely on it for merch.
Soft PVC: Go with soft PVC when you want a 3D, raised feel. This rubber-like plastic comes from custom molds. Gives you actual texture and depth. Waterproof. Extremely durable. Think mascots, luggage tags, promotional giveaways.
Metal (Zinc Alloy / Stainless Steel): Die-cast metal offers serious durability. Plus that satisfying heavy feel. After forming, parts get plated – gold, silver, antique finishes. Resists scratches. That’s why you see metal keychains in high-end brand displays. Car keychains. Corporate gifts that need to feel premium.
Resin: Liquid resin creates a clear, glass-like shell. Pour it into molds. Let it harden. You can suspend glitter, foil, or tiny objects inside. Popular for personalized nameplates. Handmade market goods. Custom gifts that feel special.
3. 3 Popular Ways to Make Custom Keychains
Different production methods change things. How your artwork looks. The minimum order size. The overall feel of the final product.
Method 1: Resin Casting
Resin casting is simple in concept. Pour liquid epoxy into a silicone mold. Get transparent, handmade keychains.
Mix the resin with a hardener. Pour it in. Add pigments, glitter, even photos if you like. Upfront cost is low. Great for DIY experiments.
But there’s a catch. Curing takes 24 to 48 hours. And you’ll need a heat gun to pop those tiny bubbles before the resin sets. Otherwise, they’re stuck forever.
Method 2: Laser Cut Acrylic
Laser cutting pairs vector artwork with UV printing. The result? Acrylic keychains with clean, polished edges.
Here’s the process. Factory prints your design onto an acrylic sheet. Then the laser traces the cutting line. Melts through the material. Leaves a smooth edge.
This method is popular for custom acrylic keychains. Why? Handles detailed shapes. Doesn’t need expensive molds.
How to Make Acrylic Custom Keychains with Laser Cutting
Prepare Vector File: Open your 300 DPI artwork in Illustrator. Mark the laser cutting path with vector lines.
UV Print Artwork: Feed the acrylic sheet into a UV printer. It applies your design. A white ink layer on the back makes colors pop.
Laser Cut the Contour: Send the cutting path to the laser cutter. The high-energy beam follows your lines. Gives you smooth, shiny edges.
Peel Protective Film: Carefully remove the protective film from both sides. Now you see that crystal-clear acrylic underneath.
Attach Hardware: Use flat-nose pliers to open the jump ring. Thread it through the pre-drilled hole. Attach the key ring. Close it back up securely.
Method 3: Mold Manufacturing for PVC and Metal Keychains
Mold manufacturing uses precision-cut steel or aluminum molds. Produces 3D PVC or metal keychains in large quantities.
CNC machines carve your 3D model in reverse into the mold. Then liquid PVC or molten metal gets injected under pressure. Cools into the final shape.
Mold manufacturing is usually more suitable for medium to large orders because the initial mold cost needs to be spread across production volume. That’s the trade-off. But once that cost is covered? Unmatched consistency. Lowest per-unit cost at scale.
4. DIY Custom Keychains vs. Professional Manufacturing
So. Make them yourself or hire a factory? Depends on your budget. How many you need. What quality level you’re after.
This table shows the trade-offs clearly.
| Factor | DIY Making | Professional Factory Manufacturing |
| Quantity | Small quantities or personal projects (e.g., 1–20 pcs) | Medium to large quantities requiring consistent quality (e.g., 50+ pcs) |
| Equipment | Required (e.g., silicone molds, hand tools, UV lamps) | Fully provided by the factory |
| Design Complexity | Limited to hand-craftable techniques | High (supports 3D molding, metal plating, and custom backings) |
| Quality & Consistency | Variable (depends on manual skills) | Highly stable across all units |
Choose DIY Making if:
- You only need a small batch. Or a personal project.
- You actually enjoy the hands-on process. Mixing pigments. Adding glitter. Trying different techniques.
- You already have basic tools. Silicone molds. A UV lamp. Cutting tools.
- You want something finished today. Not after weeks of sampling and shipping.
Choose Professional Factory Manufacturing if:
- You need a medium or large run. Every piece must look identical.
- Your design has complex irregular shapes. 3D rubber details. Plated metal finishes. Things you can’t replicate by hand.
- You’re running a commercial brand. Company promotion. Your product needs retail-grade durability.
- You’re planning a wholesale custom keychains order. Lowest per-unit cost. Branded packaging. The whole package.
5. How to Order Custom Keychains from a Manufacturer
Working with a professional factory turns your digital artwork into real, retail-quality merchandise.
Follow the standard process. It reduces miscommunication. Speeds up delivery.
[1. Submit Artwork] ──► [2. Select Options] ──► [3. Approve Proof]
│
[6. Delivery] ◄── [5. Mass Production] ◄── [4. Confirm MOQ & Timeline]
Step 1: Submit High-Resolution Design Files (AI, PSD, or PDF)
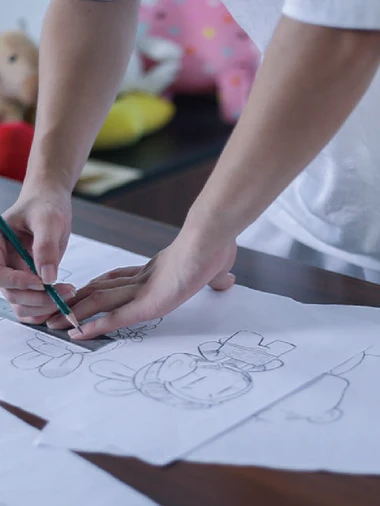
Send your files to the factory’s design team. Vector formats are ideal. AI, EPS, or PDF. If you’re sending bitmap images, use PNG or PSD files. 300 DPI or higher. Transparent backgrounds. Clearly state your desired physical size. 2 inches. 50mm. Whatever it is. And convert all text to outlines. That way your fonts don’t change unexpectedly.
Step 2: Select Material, Size, and Finishing Effects
Pick your base material. Based on budget and usage.
Then consider upgrades. Double-sided color printing. Epoxy dome coating. Holographic film. Glitter embedded in acrylic. Plated finishes like rose gold or matte black.
Step 3: Review and Approve the Digital Proof
The factory designer creates a digital mockup. Shows your artwork on the selected material model.
Check it carefully. Cutting lines. Hole placement. Color balance. Before you sign off, make sure any small text is still readable at the actual size. Once production starts, changes are expensive.
Step 4: Confirm MOQ, Sampling, and Production Timeline
Ask about the minimum order quantity. Find out how pricing changes at different volumes.
For large orders, request a physical sample. Confirm quality before full production. Agree on the sample. Payment terms. Production timeline. Usually 7 to 15 business days. Then the factory schedules production.
Step 5: Mass Production and Manufacturing
Now the factory runs the process. Automated cutting. Injection molding. UV printing. Die-casting. Whatever your method is.
Throughout production, quality control staff do regular spot checks. They ensure colors stay consistent. Prints align properly. Edges remain clean.
Step 6: Quality Inspection and Commercial Delivery
Every finished piece gets a final manual check. Confirm hardware is secure. Surfaces are free of dust and scratches.
Approved products get individually bagged. Or mounted on custom-branded backing cards. Then they’re packed into cartons. Shipped to your warehouse. Your retail store. Your distribution point.
6. Comparison of Keychain Making Methods
Let’s put the different production methods side by side. Helps you weigh costs. Volume. What fits your situation.
| Method | Cost | Best For | Production Volume |
| Resin Casting | Low (DIY) | DIY gifts & handmade crafts | Very Low (1–10 pcs) |
| Laser Cut Acrylic | Medium | Brand merchandise & anime designs | Low to High (10–1,000+ pcs) |
| PVC Molding | High upfront mold / Low per unit | Large quantity & promotional items | Medium to Large (100–10,000+ pcs) |
| Metal Manufacturing | High upfront mold / Low per unit | Premium gifts & corporate branding | Medium to Large (100–10,000+ pcs) |
Conclusion
Here’s the bottom line. Small handmade run? Bulk order for branded merch? Either way, the right materials and production methods make all the difference.
Get those right, and you end up with durable custom keychains. Ones that people actually want to use. Ones they don’t throw in a drawer and forget about. If you’re searching for a professional custom keychain manufacturer, Implementer can help turn your designs into finished products. Reliable quality. Flexible options. Worth a look.